DNS Check can send you notifications via Jira Service Management when DNS records start passing or failing. This page describes how to set up DNS Check / Jira Service Management integration.
Configure Jira Service Management
- Log in to your Jira Service Management account.
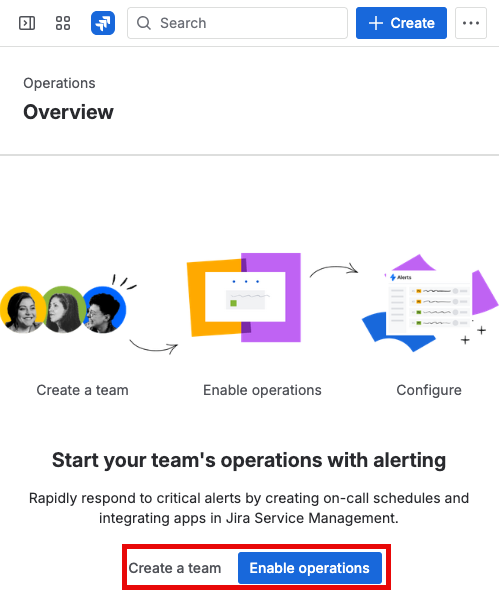
- Navigate to your team's Operations Overview page. Create a team and enable operations if you haven't already:
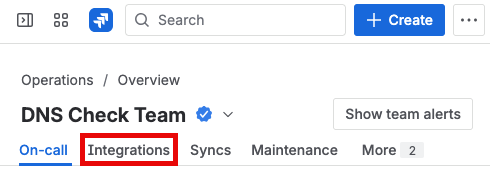
- Click the Integrations tab:
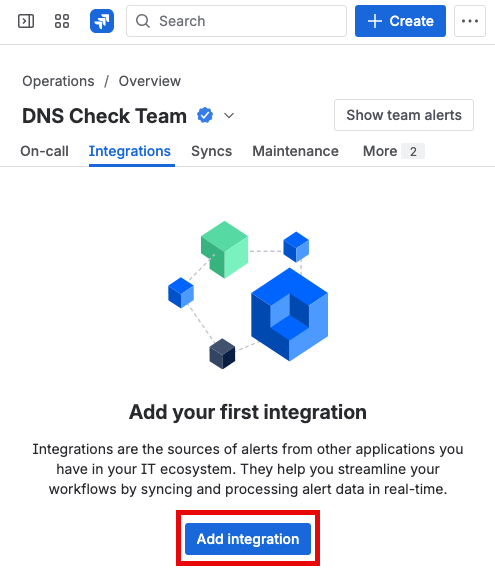
- Click the Add integration button:
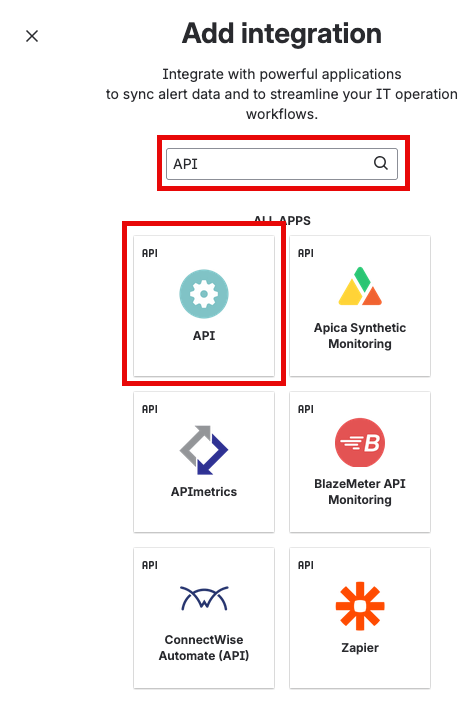
- Search for, then select the API option:
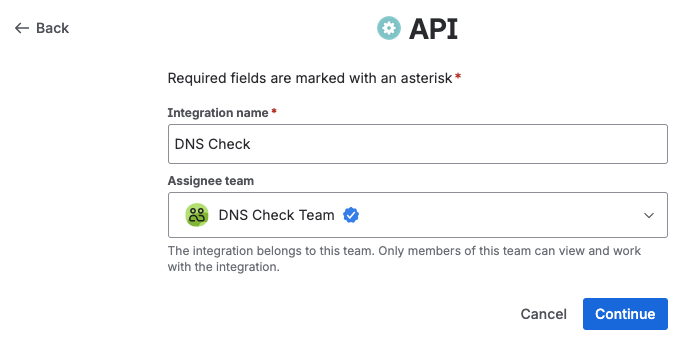
- Give the integration a name and assign a team:
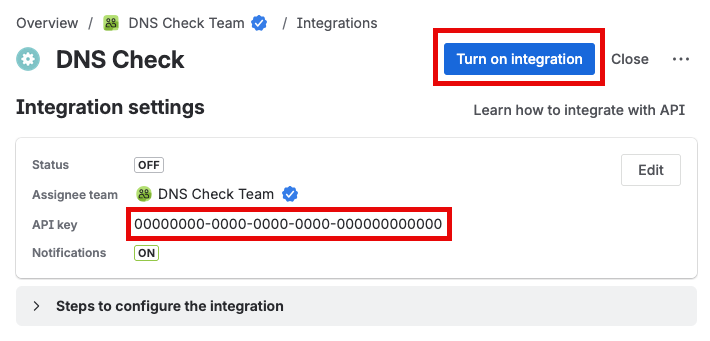
- Copy the generated API key (you'll enter this into DNS Check later), then click the Turn on integration button:
Configure DNS Check
- Log in to your DNS Check account.
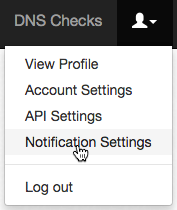
- Click the User icon in the top-right corner, then click Notification Settings:
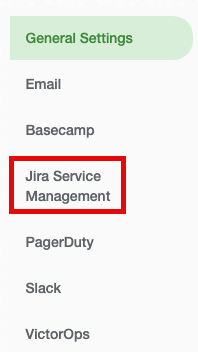
- Click the Jira Service Management tab:
- Enable Jira Service Management Integration, paste in the API key that you generated earlier, then click Save to apply the changes:

Note about the Jira Service Management URL: DNS Check defaults the URL to
https://api.atlassian.com/jsm/ops/integration/v2/alertsbecause that's the correct URL for most integrations. Atlassian may display an "Integration URL" that includes the API key as a query parameter (e.g.,https://api.atlassian.com/.../alerts?apiKey=abc123). You can paste this full URL into DNS Check. We'll automatically strip the query parameters and trailing slashes. The API key should be entered separately in the API key field. DNS Check uses the more secureGenieKeyheader for authentication rather than query parameters.
Congratulations! You're now finished integrating DNS Check and Jira Service Management.

Protect your DNS infrastructure with automated monitoring
Get notified immediately when DNS records change. Start monitoring your critical DNS infrastructure for free in under 5 minutes.
No credit card required • Cancel anytime