Jira Service Management Integration Available:
Atlassian is migrating OpsGenie to Jira Service Management. We plan to
support OpsGenie integration for as long as Atlassian keeps the product
alive. If you're using JSM, see our
Jira Service Management integration guide.
DNS Check can send you notifications via OpsGenie when DNS records start passing or failing. This page describes how to set up DNS Check / OpsGenie integration.
Configure OpsGenie
- Log in to your OpsGenie account.
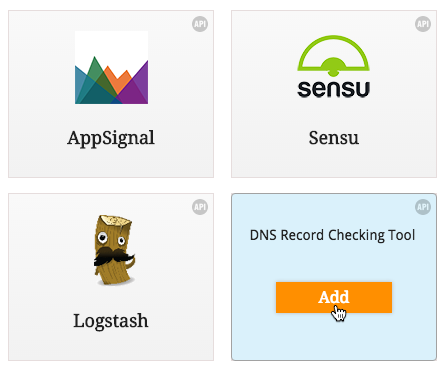
- Click on the Integrations menu on the left side of the page:

- Hover your cursor over the DNSCheck integration option, then click Add:
- Specify your desired settings, including which Team(s) and Recipients(s)
DNS Check should be sent notifications to, then click Save Integration:
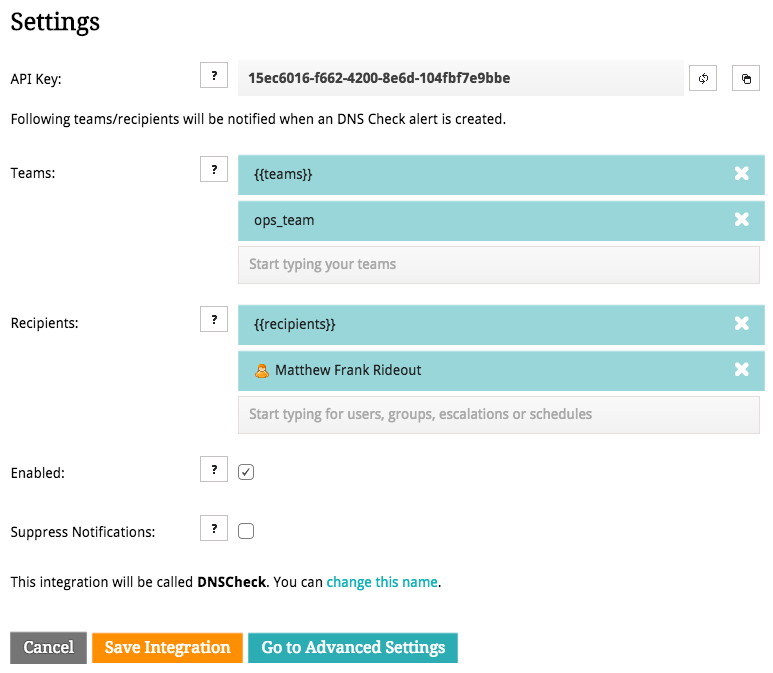
- Copy the OpsGenie API key that you generated. You'll paste this into DNS Check in the next section.
Configure DNS Check
- Log in to your DNS Check account.
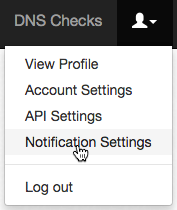
- Click the User icon in the top-right corner, then click Notification Settings:
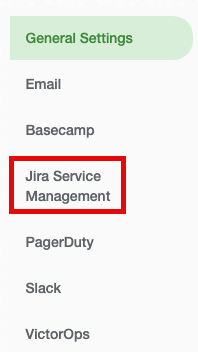
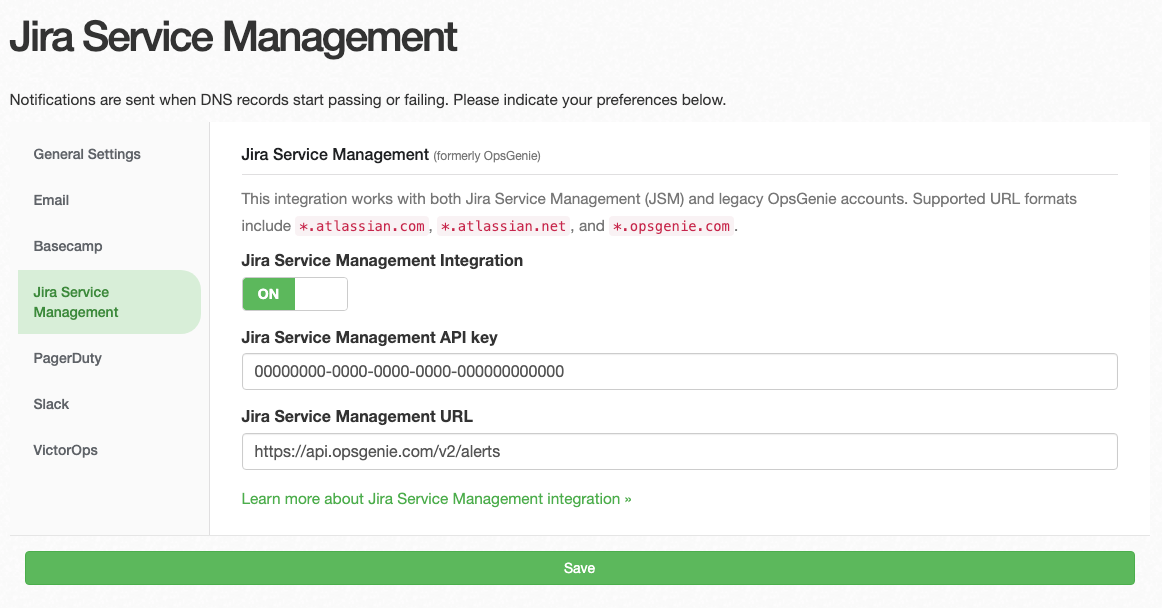
- Click the Jira Service Management tab (Jira Service Management uses an OpsGenie-compatible API):
- Enable OpsGenie notifications, and paste in the API key that you generated earlier, then click Save to apply the changes:
Congratulations! You're now finished integrating DNS Check and OpsGenie.

Protect your DNS infrastructure with automated monitoring
Get notified immediately when DNS records change. Start monitoring your critical DNS infrastructure for free in under 5 minutes.
No credit card required • Cancel anytime