Check Your DNS MX Records

MX, or Mail Exchange records are DNS records that specify which mail servers are responsible for receiving email for a domain. When someone sends you an email, their mail server looks up the MX records for your domain (the part of the email address after the @ sign), and attempts to deliver the message to a mail server that's specified by those MX records.
If MX records are improperly configured, then legitimate email may not get delivered to you, and spam may find a way to bypass your spam filter's checks.
This post provides some background on how MX records work, followed by suggestions on how to check them.
MX Record Structure
Each domain name can have one or more MX records, and each MX record has two fields - the "Preference" and "Exchange".
Preference
An MX record's "Preference" value is a number between 0 and 65,535 which indicates how preferable that record is relative to other MX records for the same domain. If a domain only has one MX record, then the Preference doesn't matter. When more than one MX record exists for a domain, the MX record with the lowest Preference is checked to decide which "Exchange", or mail server to attempt to deliver mail to first.
Having the lower Preference win can seem counter intuitive, so the Preference is also sometimes called the MX record's "distance".
If two or more MX records tie for lowest Preference value, then the sending mail server randomly picks one for the first delivery attempt.
If the first delivery attempt fails, then the sender attempts to deliver the message to the MX record with the next lowest Preference. This process repeats until the sender either succeeds in contacting a mail server, or runs out of MX records to check.
MX records are defined in part in RFC 2821. Here's what that RFC has to say on the topic of MX record preference:
Multiple MX records contain a preference indication that MUST be used in sorting (see below). Lower numbers are more preferred than higher ones. If there are multiple destinations with the same preference and there is no clear reason to favor one (e.g., by recognition of an easily-reached address), then the sender-SMTP MUST randomize them to spread the load across multiple mail exchangers for a specific organization.
Exchange
An MX record's "Exchange" value contains the domain name of the host that mail should be delivered to. There should be an A and/or AAAA DNS record that maps the Exchange domain to an IP address.
CNAME records are sometimes used to indirectly map Exchange values to IP addresses. While this is understood by some email senders, it is not recommended because it's technically invalid according to RFC 1123. Not all sending mail servers are guaranteed to support sending to a domain when they encounter an MX record whose Exchange value is a CNAME record.
Here's what RFC 1123 says about using CNAME DNS records to resolve Exchange domain names:
The domain names that a Sender-SMTP sends in MAIL and RCPT commands MUST have been "canonicalized," i.e., they must be fully-qualified principal names or domain literals, not nicknames or domain abbreviations. A canonicalized name either identifies a host directly or is an MX name; it cannot be a CNAME
A Simple MX Record Example
Let's look at a simple MX record example. Here's part of a DNS zone file which has two MX records for the example.com domain:
; Name       Type  Preference   Exchange
example.com. MX    10           mx.example.com.
example.com. MX    20           mx2.example.com.
The first MX record has a Preference of 10, and therefore is more desirable than the second MX record, which has a Preference of 20. Based on the contents of this zone file, mail servers that are attempting to send email to addresses @example.com will first check if they can connect to the mx.example.com mail server (the first MX record's Exchange). If that fails, then they'll check if they can connect to the mx2.example.com mail server next.
A More Complex MX Record Example
The following DNS zone file is representative of what you would see for a domain that has incoming email hosting or spam filtering provided by Google Apps:
; Name       Type  Preference  Exchange
example.com. MX    1           ASPMX.L.GOOGLE.COM.
example.com. MX    5           ALT1.ASPMX.L.GOOGLE.COM.
example.com. MX    5           ALT2.ASPMX.L.GOOGLE.COM.
example.com. MX    10          ALT3.ASPMX.L.GOOGLE.COM.
example.com. MX    10          ALT4.ASPMX.L.GOOGLE.COM.
The above DNS zone file has 5 MX records for example.com:
- One MX record's priority is 1. The Exchange that's specified by it (ASPMX.L.GOOGLE.COM) is checked first.
- Two MX record's priorities are 5. The two Exchanges specified by these MX records (ALT1.ASPMX.L.GOOGLE.COM and ALT2.ASPMX.L.GOOGLE.COM) are checked second and third in random order.
- Two MX record's priorities are 10. The two Exchanges specified by these MX records (ALT3.ASPMX.L.GOOGLE.COM and ALT4.ASPMX.L.GOOGLE.COM) are checked fourth and fifth in random order.
Spam, Spam, MX Records and Spam
Some domains have MX records which point to Exchanges that have differing levels of spam filtering in place. As an example, let's copy the DNS zone file that was just looked at, but add an extra MX record with a preference of 20 to the end:
; Name       Type  Preference  Exchange
example.com. MX    1           ASPMX.L.GOOGLE.COM.
example.com. MX    5           ALT1.ASPMX.L.GOOGLE.COM.
example.com. MX    5           ALT2.ASPMX.L.GOOGLE.COM.
example.com. MX    10          ALT3.ASPMX.L.GOOGLE.COM.
example.com. MX    10          ALT4.ASPMX.L.GOOGLE.COM.
example.com. MX    20          mail.example.com.
Let's assume for this example that the new MX record's Exchange (mail.example.com) has less effective spam filtering in place than the others.
The new MX record has the highest Preference value (20), so RFC complaint senders won't attempt to send mail to this server unless they fail to connect to all five of the lower preference Exchanges. At first thought, it may seem that all is well, and that no mail will be delivered to the mail.example.com server unless there's an issue that takes Google Apps offline, but there are two serious issues with this configuration:
-
Many spammers know that higher preference MX records often have less effective spam filtering in place, and will actually attempt to deliver mail to the higher preference MX records first. Spammers don't always follow the RFCs!
-
Think about what would happen if a spammer who is following the RFCs gets their IP address blocked by Google Apps. After failing to connect to the first five MX record domains, they would eventually check if they can deliver their mail to the mail.example.com server.
For these reasons, it's important to carefully consider what spam filtering is in place for every MX Record Exchange listed in your zone file. Weigh the value of redundancy against the cost of increased spam.
Bad MX Record = Missing Email
Let's look at what can happen if you replace email services, and forget to remove the old service's MX records.
For this example, let's assume that example.com's email is currently hosted by Google Apps, and is being switched to FastMail.
According to Google App's MX record documentation, the MX records should look something like this:
; Name       Type  Preference  Exchange
example.com. MX    1           ASPMX.L.GOOGLE.COM.
example.com. MX    5           ALT1.ASPMX.L.GOOGLE.COM.
example.com. MX    5           ALT2.ASPMX.L.GOOGLE.COM.
example.com. MX    10          ALT3.ASPMX.L.GOOGLE.COM.
example.com. MX    10          ALT4.ASPMX.L.GOOGLE.COM.
According to FastMail's MX record documentation, the MX records should look something like this:
; Name       Type  Preference  Exchange
example.com. MX    10          in1-smtp.messagingengine.com
example.com. MX    20          in2-smtp.messagingengine.com
Both configurations are perfectly valid by themselves. The problem starts if these MX records co-exist.
For example, if during the Google Apps to FastMail migration, the old Google Apps MX records aren't removed, you'll end up with a zone file that looks something like:
; Name       Type  Preference  Exchange
example.com. MX    1           ASPMX.L.GOOGLE.COM.
example.com. MX    5           ALT1.ASPMX.L.GOOGLE.COM.
example.com. MX    5           ALT2.ASPMX.L.GOOGLE.COM.
example.com. MX    10          ALT3.ASPMX.L.GOOGLE.COM.
example.com. MX    10          ALT4.ASPMX.L.GOOGLE.COM.
example.com. MX    10          in1-smtp.messagingengine.com
example.com. MX    20          in2-smtp.messagingengine.com
This is a problem because mail will stil be delivered to Google Apps unless the sending mail server is unable to connect to at least 3, and sometimes as many as 5 of Google Apps's mail servers.
The fix here is to remove now invalid MX records.
When an MX Record Doesn't Exist
If no MX record exists for a domain, then the fallback behavior is to check that domain's A record, and attempt to deliver mail to it. While this is technically valid, we do not recommend it, because there's no guarantee that all mail servers will implement this fallback behavior properly. It's also possible that sending email from or to a domain that doesn't have an MX record could trigger spam filtering mechanisms.
How to Check MX Records
Now that we've learned about how MX records work, how do we check them? Three options are described in the sections that follow.
The first two methods for checking MX records involve using the dig and nslookup command line utilities. These two commands have very similar functionality. Given the choice between the two, I recommend using dig since it's output is more clear than what nslookup provides.
The third method is to use the DNS Check web service to check, then monitor MX records.
Checking MX Records with dig
dig is a command line utility that's used to lookup DNS records. It's installed in most Mac OS X and Linux systems. Here's an example dig invocation to lookup the MX record for dnscheck.co:
dig mx dnscheck.co
dig's output will look familiar to anyone who is familiar with DNS zone files:
; <<>> DiG 9.8.3-P1 <<>> mx dnscheck.co
;; global options: +cmd
;; Got answer:
;; ->>HEADER<<- opcode: QUERY, status: NOERROR, id: 47564
;; flags: qr rd ra; QUERY: 1, ANSWER: 2, AUTHORITY: 0, ADDITIONAL: 0

;; QUESTION SECTION:
;dnscheck.co.           IN  MX

;; ANSWER SECTION:
dnscheck.co.        299 IN  MX  10 mx.dnscheck.co.
dnscheck.co.        299 IN  MX  20 mx2.dnscheck.co.

;; Query time: 74 msec
;; SERVER: 192.168.111.2#53(192.168.111.2)
;; WHEN: Sat Oct 17 06:43:13 2015
;; MSG SIZE  rcvd: 68
Checking MX Records with nslookup
nslookup is a command line utility that's used to lookup DNS records. It's installed in most Windows, Mac OS X and Linux systems. Here's an example nslookup invocation to lookup the MX record for dnscheck.co:
nslookup -query=mx dnscheck.co
nslookup's output is a little less useful than diff's, but it still shows the most important information:
Server:     192.168.111.2
Address:    192.168.111.2#53

Non-authoritative answer:
dnscheck.co mail exchanger = 10 mx.dnscheck.co.
dnscheck.co mail exchanger = 20 mx2.dnscheck.co.

Authoritative answers can be found from:
Checking MX Records with DNS Check
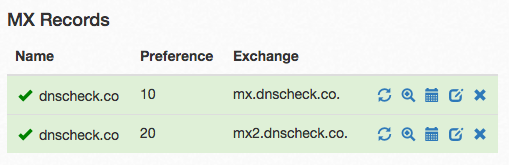
DNS Check is a web service that's used to monitor, share and troubleshoot DNS records. Once you have your MX records specified in DNS Check, it will automatically monitor those records, and notify you if the MX records change in the future.
Here's an example of how MX records look when they're being monitored by DNS Check:
A detailed tutorial for monitoring DNS records is on DNS Check's Monitor DNS Records page. Here's a quick outline of the steps:
- Sign up for an account, or login to your existing one. Free accounts can check up to 10 MX (or other DNS) records at a time. Paid accounts can check more records.
- Create a DNS record group by clicking on the "DNS Checks" link in the navigation bar, then the "Add DNS record group" button, and filling out the form.
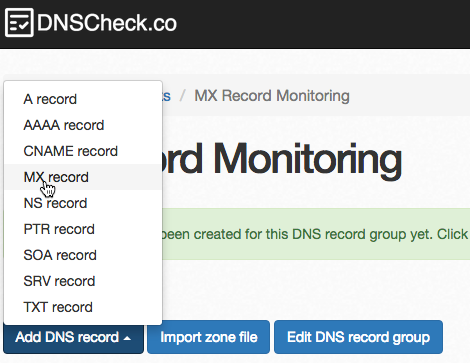
-
Click the "Add DNS record" button, then "MX Record":
-
Enter the MX record's Name, Preference and Exchange values. Here's an example:
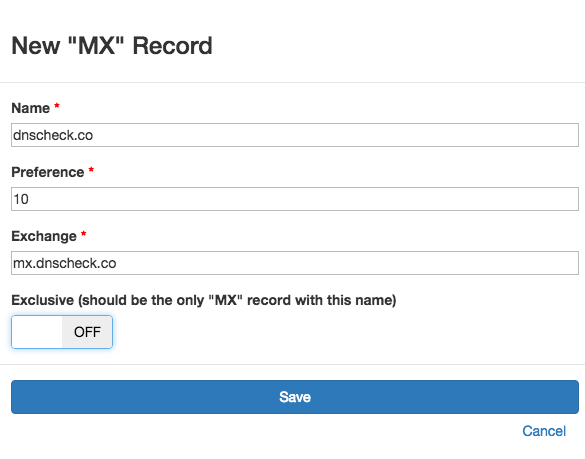
- When the Exclusive option is on, DNS Check will report a failure if it encounters more than one MX record. When it's turned off, DNS Check will only return a failure if the MX record(s) that you specify don't exist. In other words, turn on the Exclusive option if you have only one MX record for this domain. Otherwise, turn it off.
- Add any additional MX records that you'd like checked.
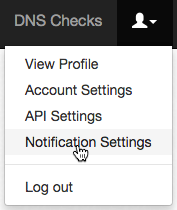
-
After you're finished entering the MX records that you'd like checked, configure your notification options by navigating to the "Users" icon in the top-right corner, then clicking "Notification Settings":