
On this page, we'll integrate Pingdom with DNS Check, so that Pingdom can take advantage of DNS Check's DNS record monitoring capabilities. We'll do this by combining a Pingdom HTTP check with the DNS Check API.
Pingdom provides website monitoring, including the ability to check A and AAAA records. Unfortunately, Pingdom by itself does not support monitoring other types of DNS records, such as MX records. This is where DNS Check comes in.
DNS Check provides an advanced DNS record monitoring service that allows you to monitor sets of DNS records for errors. DNS Check enables you to do things that most other DNS record monitoring tools don't. For example, DNS Check can check MX and SPF records, specify that a DNS record should be the only record of its name/record type combination, and import entire zone files for monitoring.
DNS Check supports monitoring the following DNS record types:
- A Records
- AAAA Records
- ALIAS Records
- CAA Records
- CNAME Records
- Load Balancer Records
- MX Records
- NS Records
- Reverse DNS (PTR) Records
- SOA Records
- SPF Records
- SRV Records
- TXT Records
Monitoring Options
There are two approaches you can take to monitoring DNS records:
- Monitor individual DNS records
- Monitor DNS record groups
We usually recommend monitoring DNS record groups, since that allows you to logically group your DNS records in a way which usually simplifies the Pingdom configuration. For example, you could create a single DNS record group that monitors all DNS records that relate to your mail servers. Check out the DNS Record Groups document for more details on what DNS record groups are, and how to work with them.
DNS Check Configuration
Let's get started by configuring DNS record monitoring within DNS Check:
- Create a DNS record group, then import the DNS records that you'd like to monitor. The Monitor DNS Records document describes how to do this.
- Generate a DNS Check API key. We'll use this in the next section.
Construct the URL to Monitor - DNS Record Group
Before we configure Pingdom, we need to construct the URL for Pingdom to check. Here's an example:
https://www.dnscheck.co/api/v1/groups/ea883d67-d9f6-45e3-b3a1-844dd1857824?api_key=YOUR_API_KEY
There are three portions of the above URL:
- https://www.dnscheck.co/api/v1/groups/ - this prefix is a constant for all DNS Check API calls
- ea883d67-d9f6-45e3-b3a1-844dd1857824 - replace this with the UUID of the DNS record group that you'd like to check. The UUID is the 36-character string that follows "/tests/" in the DNS record group URL. For example, this DNS record group's UUID is "ea883d67-d9f6-45e3-b3a1-844dd1857824".
- ?api_key=YOUR_API_KEY - replace "YOUR_API_KEY" with the DNS Check API key that you generated earlier.
After you've constructed the URL to check, you can view it in your web browser to verify that it's working correctly.
The above is all that's needed if you wish to check a DNS record group. If, however, you want to check a specific DNS record, you'll need to add one more parameter, which represents the DNS record's ID.
Construct the URL to Monitor - Individual DNS Record
If you prefer to monitor an individual DNS record than a DNS record group, you'll need to add one more parameter, which represents the DNS record's ID.
Here's the URL that we used in our previous DNS record group example:
https://www.dnscheck.co/api/v1/groups/ea883d67-d9f6-45e3-b3a1-844dd1857824?api_key=YOUR_API_KEY
Here's an example of how you would monitor the DNS record with an ID of "8" located within the above DNS record group:
https://www.dnscheck.co/api/v1/groups/ea883d67-d9f6-45e3-b3a1-844dd1857824/8?api_key=YOUR_API_KEY
Notice that the only characters added to the DNS record group's URL were "/8".
A DNS record's ID is the number that follows the UUID in the DNS record's details or history URL. For example, this DNS record has an ID of "1".
Pingdom Configuration
Now we're ready to configure Pingdom:
- Log in to your Pingdom account.
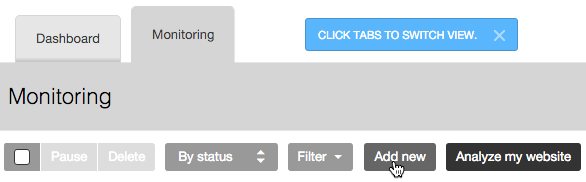
- Click the Monitoring tab.
- Click the Add new button:
- Give the check a name, and paste the URL that you constructed in the previous section:
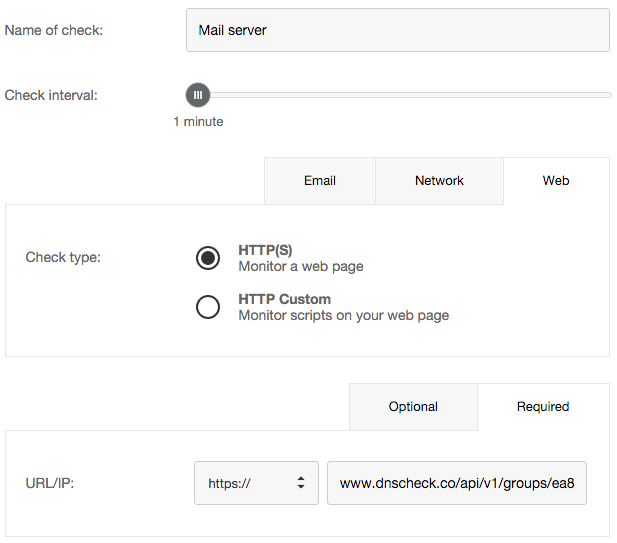
- Click on the Optional tab.
- Paste
"status": "pass",into the "Check for string" field:
- Set the remaining fields to your desired values, then click Create Check.

Protect your DNS infrastructure with automated monitoring
Get notified immediately when DNS records change. Start monitoring your critical DNS infrastructure for free in under 5 minutes.
No credit card required • Cancel anytime